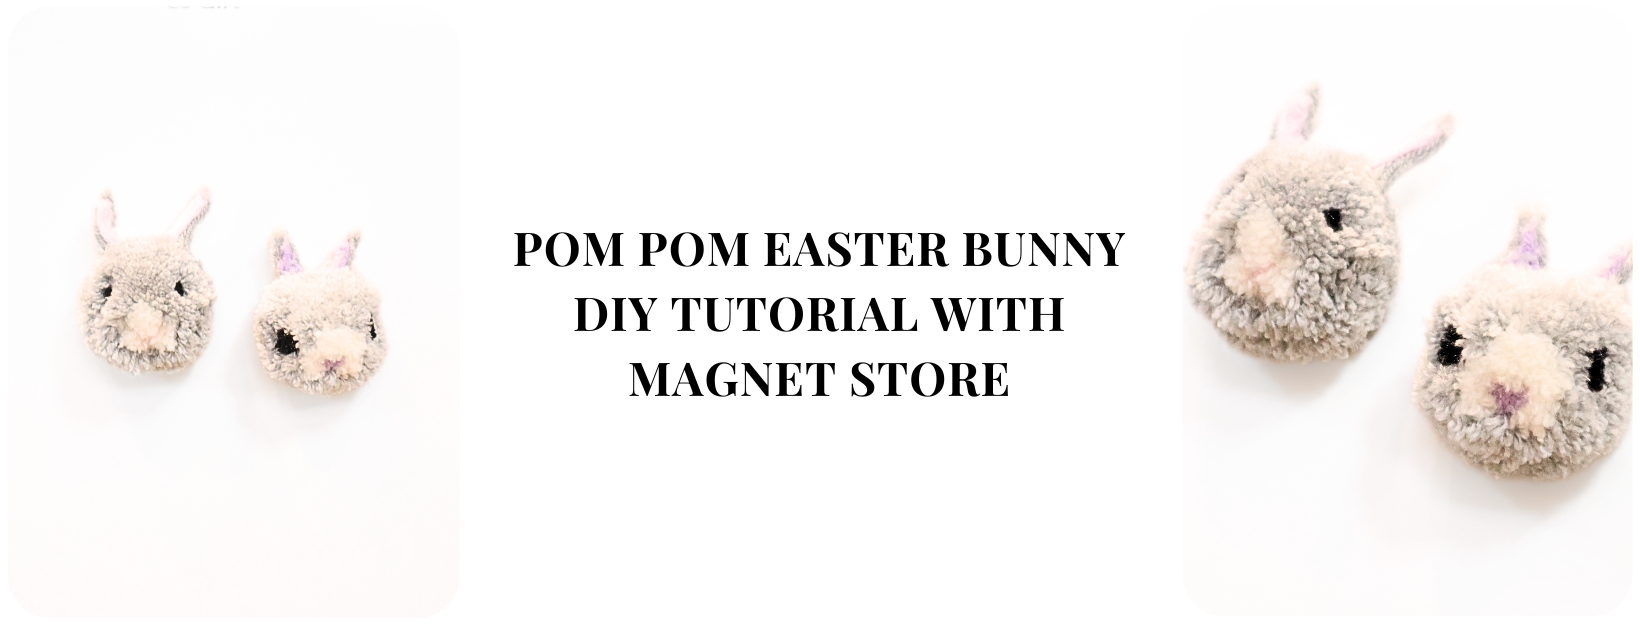
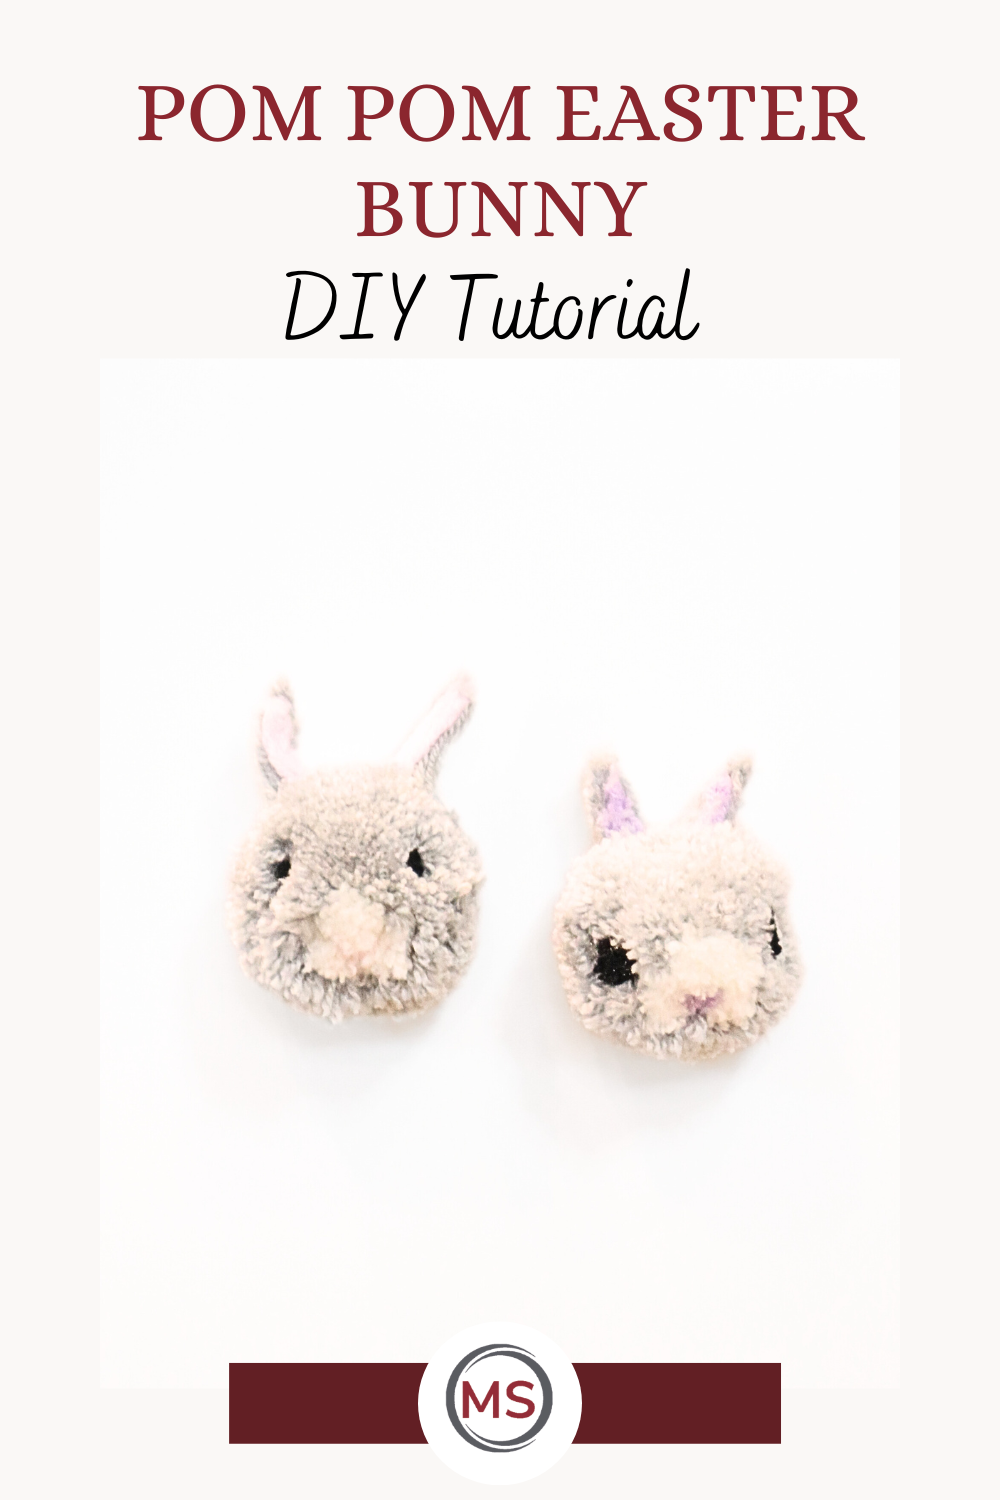
Let the bunny crafting festivities begin! Every Easter, our family gathers for a joyous day filled with activities. While the younger ones embark on an exciting Easter egg hunt and engage in creative crafts, the adults enjoy a leisurely lunch. This year, we're expecting two distinct age groups to join us, and we've come up with the perfect project to appeal to teens and their friends – a charming, magnetic pom-pom bunny! In this tutorial, I'll guide you through each step, providing a comprehensive list of supplies and some handy tips to ensure your bunny-making experience is a hopping success.
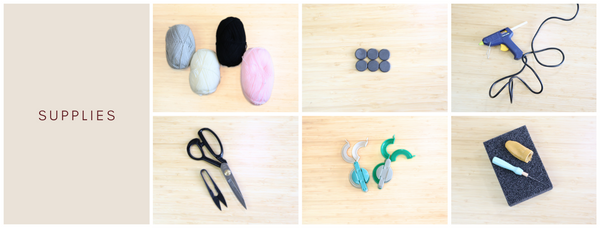
Supplies Needed:
- Ferrite Disc Magnets
- Medium Pom Maker
- Black Wool
- White Wool
- Pink Wool
- Wool in your Bunny Colour choice
- Large fabric scissors
- Small and sharp pair of scissors for some precise trimming
- Felting needle to make the ears.
- Waxed thread is optional but recommended. If you can, use a very strong, non-slip thread. You can also use dental floss.
Choosing your wool
- For this project, make sure to have some white yarn and a tiny bit of pink for the bunny's nose and some for the ears. You'll also need a small quantity of black yarn for the eyes. Now, pick your preferred bunny colour – light grey, light brown, or camel shades all work well for bunnies.
- *Tip -If you use a darker colour for your bunny, wrap a bit of a lighter colour around the eyes to ensure they pop.
Depending on whether younger kids are making the pom or you are making these bunnies for gifts, it will help you determine the type of wool you would use.
For the softest, cuddliest bunnies, choose nice, soft yarn, such as wool and alpaca or merino blends. DK or Aran weights work well. If you use DK, wrap a tiny bit more in each step to match the volume of Aran.
Pom Pom Instructions:
All steps 1- 7 Will be the face part of the bunny and are done on one side of your pom pom maker.
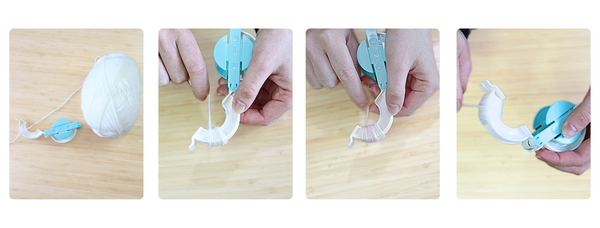
Step One: White Nose
Take around 10 turns of white yarn and tightly wrap it at a ⅓ position on your Pom Maker, creating a compact bundle. Designate this side as the chin. Consequently, the opposite side becomes the top of the head.
Step Two: Pink inside part of the nose
Begin wrapping a single layer of pink yarn, commencing from the centre of the white nose, and extending it a bit more towards the chin end.
Step Three: Adding more white to the nose
Continue wrapping additional layers of white yarn over the pink section and extend it further towards the chin end. This technique will create a fluffy white patch around the pink part, which forms the middle of the nose. It adds a delightful facial feature to the charming look that many bunnies proudly showcase!
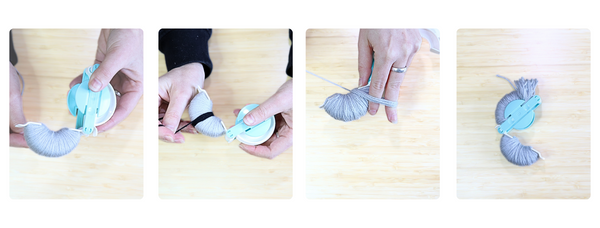
Step Four: The Face
Next, cover the entire Pom Maker with your chosen primary bunny colour until it feels substantially full.
- Bunny eyes are positioned on the sides of their heads, so make sure to add them on top of a sufficiently thick layer. This prevents the eyes from ending up too close together in the middle. Stop wrapping when you feel it's quite full, but you can still manage to add a few more layers.
Step Five: Eyes
Bunnies boast charmingly large eyes. To form round eyes, wrap the black yarn at the center, ensuring to add the yarn tightly on top of each other in a specific spot. With our bunny, we wrapped it 14 times. However, feel free to add more wraps if you want to create even bigger eyes!
Step Six: The rest of the face
We experimented by adding extra white yarn at the chin end to form a small white patch beneath the chin, but this step is optional. Feel free to get creative and make different marks for unique facial features.
Continue adding yarn all over to cover the eyes and fill up your Pom Maker completely. However, make sure to leave a bit of space at the top of the head for adding more yarn in the next step, specifically for the ears.
- Keep in mind that the Pom Maker can handle a substantial amount of yarn. The fuller your wraps, the plumper and denser your pompoms will turn out. So, feel free to explore and see how much yarn you can wrap for your desired result!
Step Seven: The Ears
Position your index finger over the head end of the Pom Maker.
Wrap approximately 10-12 loops of longer yarn in the same colour as your bunny. Keep in mind that the length of the loops will determine the length of the ears. Don't hesitate to experiment with longer or even droopy ears if that suits your preference.
To enhance the ears, add some light pink yarn on top of the existing loops in the same manner. This will introduce delightful pink insides to the bunny's ears.
Step Eight: The Other Half
Completely cover the other half of the Pom Pom maker with your chosen bunny colour. Ensure you wrap enough yarn to match the volume of the first half.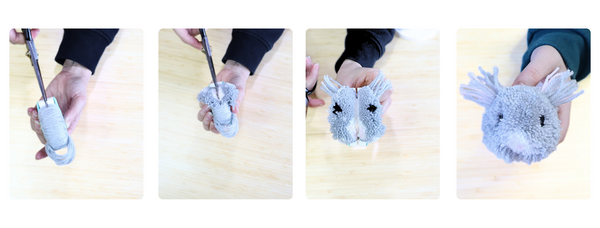 Step Nine: Cut and Tie
Join the two halves of the Pom Maker together and cut the yarn. Wrap a piece of wool around the middle and pull tightly, ensuring a strong and tight knot. You can opt for another sturdy thread type, but waxed linen threads work best for this purpose.
Great News, you are halfway through!
Shaping and Finishing Instructions:
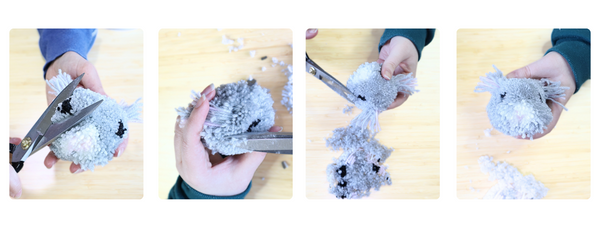
Step One: Trim the Eyes & Face
Begin by trimming away large chunks of wool over the eyes.
Shape the entire face into a 'pear' shape by trimming more towards the top of the head while maintaining a wider bottom chin end.
- Be careful not to snip the Wool meant for the ears during this shaping process.
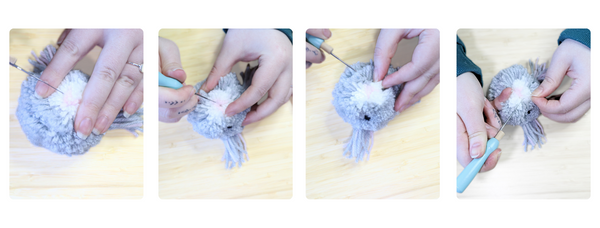
Step Two: Trim the Nose
Isolate the pink yarn in the center of the nose from the white, and cut both very short.
Divide the white yarn into three parts – above, left, and right of the pink section. Trim the white yarn shorter towards the pink center to form a 'dip' in the middle.
Carefully squeeze the three parts together and use a felting needle to poke them from all sides a few times to secure the arrangement.
Step Three: The Ears
Separate the ear wool equally into two bunches, then separate each half into the bunny colour wool and the light pink.
Begin with the wool bunch in the bunny colour. Hold the wool together in a flat ear shape. Poke the wool with your felting needle from the sides, going through each yarn from one to the next to bond the fibers together.
- Take care of the sharp needle – Do it very slowly and carefully.
Once that’s done, start adding light pink wool to one side of this.
Keep ‘felting’ until the ear has taken shape. You don’t need to ‘felt’ the wool excessively. Pushing your needle through the wool until they bond together will be enough.
- Trim well for a neat shape
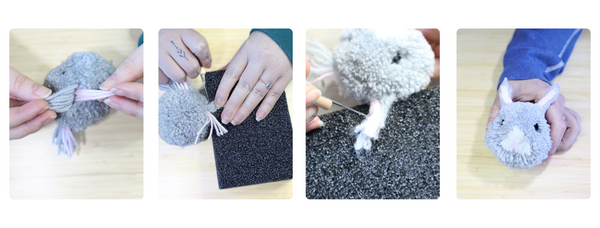
Step Four: Finishing Trim
Continue trimming with both big and small scissors until you achieve the desired appearance.
- Focus on giving extra attention around the eyes, as a more precise trim in this area will enhance the overall look of the bunny.
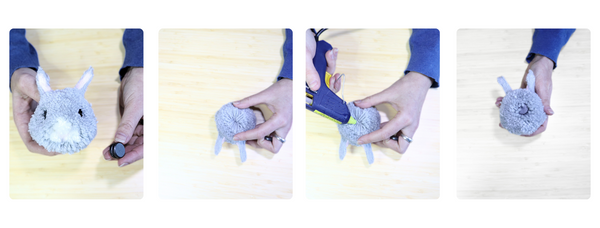
Step Five: Adding The Magnet
Using your glue gun, add your magnet to the back of your bunny.
Add your Cute Bunny to the fridge, whiteboard, pegboard, and so many more!